Expert Tips for Choosing the Best Air Conditioner from an Orlando FL HVAC Company

Selecting the best air conditioner for your home or business is a critical decision that affects comfort, energy efficiency, and long-term costs. With numerous options available, understanding how to choose the right system can seem overwhelming. Here are expert tips from HVAC contractors to help guide you through the selection process.
Assess Your Cooling Needs
Before purchasing an air conditioner, it is essential to evaluate your specific cooling requirements:
– Room Size: Measure the square footage of the space where the AC unit will be installed. Larger spaces require more cooling capacity (measured in BTUs).
– Climate: Consider your local climate conditions. For hot and humid areas, ensure the system offers both cooling and dehumidification features.
– Number of Occupants: More occupants in a space mean higher heat generation, which affects cooling demands.
By assessing these factors, you can determine an appropriate cooling capacity tailored to your needs.
Explore System Options
There are various types of air conditioning systems available:
| Type of System | Features | Best Applications |
|—————-|———-|——————-|
| Central Air Conditioning | Delivers cool air through ductwork; ideal for whole-house cooling | Large homes or buildings with existing ducts |
| Ductless Mini-Split Systems | No ductwork required; provides zoned cooling with individual units in each room or area | Homes without ducts or zones needing custom control |
| Window Units | Compact and easy to install; fits into windows or small wall openings | Single rooms or smaller spaces |
| Portable AC Units | Freestanding units that can be moved between rooms as needed | Temporary cooling solutions or small spaces |
Each system has its pros and cons depending on your priorities, such as cost, installation complexity, and energy efficiency.
Key Features to Look For
HVAC experts recommend looking for features that enhance performance and convenience: 1. Energy Efficiency Ratings: Choose systems with high SEER (Seasonal Energy Efficiency Ratio) ratings for lower utility bills. 2. Programmable Thermostats: Modern systems often come with smart thermostat compatibility for better temperature control. 3. Air Quality Enhancements: Certain units include filters or ionizers that improve indoor air quality by reducing allergens. 4. Variable-Speed Compressors: These allow precise temperature control and reduce sudden spikes in energy use.
Consult an HVAC Professional
Even after conducting research, consulting a licensed HVAC contractor like www.orlandohvac.net is invaluable. They can help: – Perform detailed load calculations specific to your property. – Recommend appropriate brands based on your budget and preferences. – Identify potential installation challenges ahead of time.
An experienced contractor ensures you not only find a suitable air conditioner but also achieve optimal performance over its lifespan.
By carefully evaluating your needs and seeking expert advice, you can select an air conditioning system that provides reliable comfort while optimizing energy efficiency year-round.
Tips for Choosing an Energy-Efficient Orlando HVAC System
Energy efficiency is a crucial factor to consider when selecting an air conditioning system for your home. Not only does it impact your energy bills, but it also plays a significant role in minimizing your environmental footprint. HVAC contractors often emphasize the importance of efficiency ratings and proper system selection for long-term savings and sustainability.
Understanding SEER Ratings for AC Repair Orlando
- Higher SEER Ratings: The higher the SEER rating, the more efficient the system. Modern air conditioners typically have SEER ratings ranging from 13 to 25.
- Minimum Standards: In most regions, a minimum SEER rating of 14 or higher is required for new units. However, opting for a unit with a higher rating can result in greater energy savings.
- Cost vs. Efficiency Balance: While high-SEER systems may have a higher upfront cost, they often pay off in reduced energy consumption over time.
Explore Energy Star Certified Models with Expert HVAC Service Orlando
- Lower operating costs
- Reduced greenhouse gas emissions
- Reliable performance standards
Check local utility incentives or rebates that may be available when purchasing ENERGY STAR-certified equipment.
Benefits of Investing in Energy Efficiency
Financial Savings
Efficient systems consume less electricity, leading to lower monthly utility bills over time.
Longer Equipment Lifespan
Energy-efficient units often operate with less strain, which helps reduce wear and tear on components.
Environmental Impact
Lower energy usage translates to reduced carbon emissions, making these systems more environmentally friendly.
Key Features That Improve AC Efficiency
- Variable-Speed Compressors: These allow the system to adjust its cooling output based on current needs, using less energy than single-speed compressors.
- Smart Thermostats Compatibility: Pairing your AC with a smart thermostat can help optimize temperature settings and reduce wasteful cooling.
- Zoning Capabilities: Zoning allows you to cool specific areas of your home rather than running the system at full capacity throughout the house.
- High-Efficiency Filters: These improve airflow and prevent dirt buildup in your system, ensuring optimal performance.
| Feature | Benefit | How it Improves Efficiency |
| Variable-Speed Compressors | Customized cooling | Reduces unnecessary power usage |
| Smart Thermostat | Optimized temperature settings | Prevents overcooling |
| Zoning | Focused cooling | Avoids wasting energy |
| High-Efficiency Filters | Enhanced airflow | Maintains peak operation |
Consult HVAC Contractors for Expert Advice
While understanding efficiency metrics is essential, consulting with HVAC professionals ensures you select a unit tailored specifically to your home’s needs. Contractors can perform load calculations based on factors like square footage, insulation quality, and climate conditions to recommend appropriate options that maximize both comfort and cost-effectiveness.
Investing in an energy-efficient air conditioner doesn’t just save money—it contributes positively to both your household’s comfort level and environmental sustainability goals. Always compare options carefully while keeping long-term benefits in mind before making your final decision.
Consider Energy Efficiency When Choosing an Air Conditioning System
Look for the SEER Rating
The Seasonal Energy Efficiency Ratio (SEER) is a key indicator of an air conditioner’s efficiency. A higher SEER rating means better energy efficiency. The U.S. Department of Energy mandates that all new central air conditioners must have a minimum SEER rating of 13 or 14, depending on the region.
- For warm climates: Consider systems with a SEER rating of 16 or higher.
- For moderate climates: Systems with a SEER rating between 14 and 16 may suffice.
Energy Star Certification
Air conditioners with the ENERGY STAR label meet strict guidelines set by the Environmental Protection Agency (EPA). These units are designed to use less energy, saving you money while reducing greenhouse gas emissions.
Types of Energy-Efficient Systems
- Central Air Conditioners: Usually more efficient for cooling entire homes.
- Ductless Mini-Split Systems: Ideal for zoning and smaller spaces, offering higher control over specific areas.
- Heat Pumps: Provide both heating and cooling while being highly efficient compared to traditional systems.
- Window Units or Portable ACs: Less efficient but appropriate for small rooms or supplemental cooling.
| System Type | Typical SEER Rating Range | Best For |
| Central Air Conditioners | 14 – 26 | Whole-home cooling |
| Ductless Mini-Split | 16 – 30 | Zoned comfort |
| Heat Pumps | 14 – 20 | Heating and cooling |
| Window/Portable Units | N/A | Small spaces |
Programmable Thermostats and Smart Features
- Programmable thermostats: Let you set schedules to optimize usage.
- Smart thermostats: Automatically adjust temperatures based on habits and external conditions.
- Variable-speed compressors: Operate more efficiently by running at lower power levels when full capacity isn’t needed.
Long-Term Savings vs Initial Costs
While energy-efficient systems typically cost more upfront, they lead to significant savings over time thanks to reduced utility bills. It’s essential to calculate the potential savings using an online energy calculator or consulting with an HVAC professional.
When considering total costs, remember: – Federal tax credits may apply to qualifying high-efficiency systems. – Some states offer rebates or incentives for upgrading to energy-efficient models.
By prioritizing energy efficiency when choosing your air conditioning system, you’ll not only reduce operational costs but also contribute positively toward sustainability efforts. A professional HVAC contractor can help guide you through the process, ensuring you make the best choice tailored to your home’s specific needs.
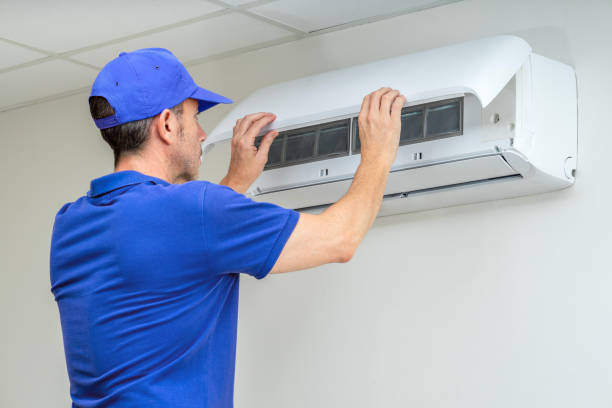
Evaluating Noise Levels and Additional Features in Modern Air Conditioners
When selecting a modern air conditioner, it’s not just about cooling capacity or design. Noise levels and additional features play a pivotal role in determining comfort and long-term satisfaction with your investment. Here’s an in-depth look into these factors to help you make an informed decision.
Understanding Noise Levels in Air Conditioners
The amount of noise an air conditioner produces can significantly impact the comfort of your home or office. Modern air conditioning units are designed with noise reduction technology, but it’s still essential to evaluate decibel (dB) ratings when comparing models.
- Quiet Operation: Look for units labeled as “ultra-quiet” or “silent operation.” Units with noise levels below 50 dB are ideal for bedrooms, nurseries, or living spaces where minimal disruption is preferred.
- Outdoor Unit Noise: Keep in mind that the condenser unit installed outside may also produce noise. Verify its noise level if outdoor peace is a priority, especially for patios or gardens nearby.
- Variable Speed Compressors: These compressors adjust the cooling output based on the current need rather than running at full capacity. This feature not only improves energy efficiency but also reduces operational noise.
Noise Level Comparison Table
| Decibel Rating (dB) | Noise Equivalent | Ideal For |
| 40-50 dB | Whispering conversation | Bedrooms, studies |
| 51-60 dB | Normal conversation | Living rooms |
| Above 61 dB | Louder than background chatter | Large open spaces |
Key Additional Features to Look For
- Smart Connectivity: Wi-Fi-enabled systems allow you to control temperature settings remotely through apps or smart home systems like Alexa or Google Home. This feature adds convenience by letting you adjust cooling even when you’re away from home.
- Air Purification Technology: Built-in filters like HEPA filters or ionizers improve indoor air quality by trapping allergens and pollutants—a critical feature for households with individuals prone to allergies or respiratory issues.
- Dehumidification Mode: Many modern ACs include a dehumidifier function that reduces excess moisture from the air without overcooling the space, making it perfect for humid climates.
- Zoning Capabilities: Advanced systems can cool specific zones or rooms individually without wasting energy on unoccupied areas.
- Eco-Friendly Refrigerants: Environmentally conscious homeowners may prefer systems that use refrigerants like R-32 or R-410A, which have lower global warming potential compared to older refrigerants.

Benefits of Quiet Systems and Advanced Features
- Enhanced Comfort – Reduced operational noise ensures peaceful environments conducive to rest and focus.
- Improved Efficiency – Smarter systems adapt better to usage patterns, minimizing wasted energy while maximizing performance.
- Better Air Quality – Integrated filtration options ensure that your indoor environment stays healthy year-round.
- Convenience at Your Fingertips – Smart controls simplify management while saving time.
By paying attention to both sound levels and available features during your selection process, you ensure your air conditioning system enhances—not disrupts—your living experience while meeting all functional needs effectively.
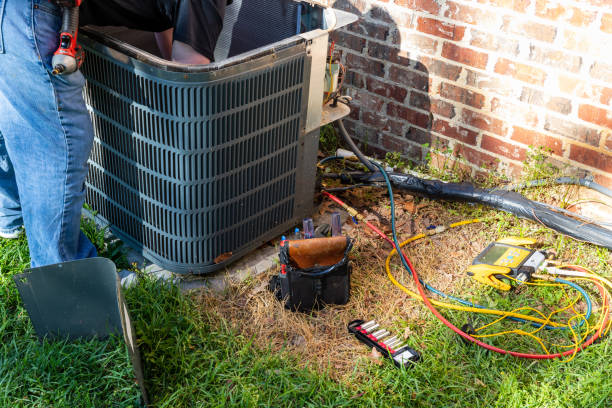
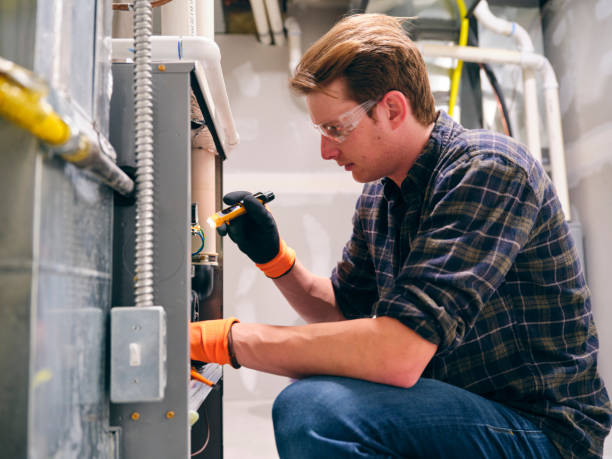
Why Professional Installation is Crucial for a Reliable HVAC System
When it comes to your HVAC system, professional installation is not a luxury—it’s a necessity. Investing in expert installation ensures that your system operates efficiently, reliably, and safely. Below are some key reasons why professional installation is critical for the long-term performance of your heating, ventilation, and air conditioning (HVAC) system.
Proper Sizing and System Selection
A trained HVAC contractor will assess your home’s unique needs to recommend the right system size and type. Correct sizing prevents issues like:
– Short cycling: When a unit shuts off prematurely because it’s too large for the space.
– Inefficiency: Overloading or underutilizing the unit due to improper sizing can increase energy consumption and costs.
– Excessive wear and tear: A poorly sized system may experience frequent breakdowns or reduced lifespan.
Contractors use advanced tools, such as Manual J load calculations, to ensure the selected unit matches the heating and cooling demands of your home.
Ensuring Energy Efficiency
Improper installation can lead to significant energy waste. Studies show that poorly installed systems can reduce energy efficiency by up to 30%. Professionals:
– Seal ductwork properly to prevent air leaks.
– Ensure refrigerant levels are within manufacturer specifications.
– Optimize thermostat placement for better temperature regulation.
This attention to detail helps reduce utility expenses while maintaining indoor comfort.
Enhanced Performance and Longevity
Professional installation minimizes risks that could compromise system performance or shorten its lifespan:
– Incorrect electrical wiring could cause malfunctions or safety hazards.
– Poorly connected ductwork can lead to uneven airflow across rooms. – Misaligned components may result in frequent repairs over time.
Certified technicians follow best practices and adhere to all local building codes to deliver long-term value from your investment.
Safety Considerations
HVAC systems involve intricate components such as electrical connections, refrigerants, and gas lines (in some cases). Without proper training, DIY installations pose risks like:
1. Carbon monoxide leakage from improperly vented furnaces. 2. Electrical fires due to faulty wiring. 3. Refrigerant exposure leading to health hazards.
Licensed contractors prioritize these safety concerns by following industry standards during setup.
Warranty Protection
Most HVAC manufacturers offer warranties that require professional installation as a condition of coverage. DIY installations or work performed by unlicensed individuals could void these warranties entirely. Hiring an expert ensures you maintain warranty eligibility while safeguarding against defects or early failures.
| Professional Installation Benefits | DIY Risks |
| Proper equipment sizing | Incorrect sizing issues |
| Warranty compliance | Voided warranties |
| Energy efficiency | Increased operational costs |
| Enhanced safety | Health and fire risks |
Peace of Mind with Post-Installation Support
Beyond setup, many contractors offer extended services such as routine maintenance plans or emergency repair support. Access to professional assistance after installation adds convenience while extending the life of your system.
By trusting an experienced HVAC contractor with this critical task, homeowners ensure reliable comfort year-round while avoiding costly mistakes associated with improper installations.
Budget Considerations When Hiring an HVAC Contractor for AC Replacement
When planning to replace your air conditioning system, budgeting is a critical factor. Hiring the right HVAC contractor doesn’t just involve choosing the most affordable option—it requires balancing cost with quality service and long-term benefits. This guide outlines key cost-related considerations to help you make an informed decision.
Factors That Affect AC Replacement Costs
- Type of System: Central air systems, ductless mini-splits, and window units vary significantly in price.
- Size and Capacity: Larger homes typically require higher-capacity systems, which come at a higher cost.
- Energy Efficiency Rating (SEER): High-SEER models may have a larger upfront cost but save you money on energy bills over time.
- Ductwork Modifications: If duct repairs or upgrades are required, this can add to installation costs.
- Labor Costs: Fees charged by contractors vary depending on their expertise, certifications, and location.
Tips for Budgeting Effectively
- Request Multiple Quotes
Reach out to at least three HVAC contractors in your area for detailed estimates. Ensure each quote includes breakdowns for labor, materials, equipment, and any additional services. - Prioritize Quality Over Lowest Price
While it may be tempting to choose the cheapest contractor available, low prices often indicate shortcuts or subpar materials that can lead to future expenses. - Ask About Financing Options
Many reputable HVAC companies offer flexible payment plans or financing options that can make large upfront costs more manageable. - Consider Long-Term Savings
Investing in an energy-efficient system might be more expensive initially but could dramatically reduce utility bills over time. - Account for Maintenance Costs
A new AC unit will require routine maintenance to ensure longevity. Include ongoing maintenance fees in your budget planning.
Evaluating Value Instead of Just Cost
| Factor | Why It Matters |
| Warranty Coverage | Protects against unexpected repair costs |
| Licensing & Insurance | Ensures compliance with regulations and safety |
| Experience Level | Impacts quality of installation |
| Customer Reviews | Provides insights into reliability and service |
Red Flags to Watch Out For
- Unusually low bids without explanations
- Lack of references or online reviews
- No proof of licenses or insurance coverage
- High-pressure sales tactics demanding immediate decisions
By thoroughly assessing costs and prioritizing value over price alone, you’ll be better equipped to hire an HVAC contractor who meets both your budgetary needs and performance expectations.
The Importance of Choosing Reputable Brands and Warranties for Your HVAC System
When it comes to investing in an HVAC system, selecting reputable brands and warranties is a critical part of ensuring long-term performance, energy efficiency, and peace of mind. Making an informed decision can save you money on maintenance costs, provide consistent comfort in your home or office, and protect you from unexpected system failures.
Benefits of Choosing Reputable Brands
- Proven Performance: Reputable brands have a track record of reliability and efficiency. These companies invest in research and development to create systems that perform at peak levels.
- Energy Efficiency: Top-tier brands often offer energy-efficient models that align with modern environmental standards. This ensures lower energy bills over the lifespan of the system.
- Advanced Features: Leading manufacturers incorporate innovative technologies such as smart thermostats, multi-stage compressors, and air quality enhancements into their systems.
- Availability of Parts: Well-known brands typically have widespread availability of parts in case repairs are needed, reducing downtime.
Why Warranties Matter
- Protection Against Manufacturing Defects: A good warranty ensures that any defects in materials or workmanship are addressed at no additional cost during the covered period.
- Cost Savings on Repairs: HVAC repairs can be expensive. A strong warranty helps minimize out-of-pocket expenses by covering major components like compressors or heat exchangers.
- Extended Lifespan Assurance: Systems with long warranties often indicate the manufacturer’s confidence in their product’s durability.
| Warranty Type | What It Covers | Typical Duration (Years) |
| Limited Manufacturer | Covers specific components like compressors or coils | 5–10 |
| Labor Warranty | Covers labor costs for repairs | 1–2 |
| Extended Warranty | Optional coverage purchased separately for additional protection | Varies |
Tips for Selecting Brands and Warranties
- Research Brand Reputation: Look for brands with positive customer reviews, industry awards, or certifications like ENERGY STAR. Ask your HVAC contractor about their experience with different manufacturers.
- Compare Warranty Terms: Not all warranties are created equal—review what is included (and excluded) under each policy to avoid surprises later.
- Ask About Transferable Warranties: If you plan to sell your home in the future, a transferable warranty can add value by assuring prospective buyers that the system is still protected.
- Prioritize Longevity Over Initial Cost Savings: Cheaper systems may have shorter warranties or less reliable components, leading to higher costs over time.
Partnering with Your Contractor
A licensed HVAC contractor can provide valuable insights into which brands have proven reliability in real-world applications. They may also help you register your warranty properly—a step often required by manufacturers to activate coverage.
Investing time upfront to evaluate reputable brands and robust warranties ensures not only comfort but also the financial security of knowing your HVAC system will stand up to years of use with minimal hassle.
- Expert Tips for Choosing the Best Air Conditioner from an Orlando FL HVAC Company
- The Benefits of Choosing an Orlando FL HVAC Company for Repair and Replacement Services
- Your Comprehensive Guide to Choosing an Orlando FL HVAC Company for Residential Installation
- Finding the Best Orlando FL HVAC Company for Homeowners
- The Ultimate Step-by-Step Guide to AC Installation by an Orlando FL HVAC Company
- Understanding Orlando HVAC Systems: A Comprehensive Guide for New or Soon-To-Be Homeowners
- The Ultimate Homeowner’s Guide to Choosing the Best Orlando FL HVAC Company
- Understanding Orlando HVAC Services: What They Do and Why They’re Essential for Your Home